
MariBank Transfer Setup
MariBank Transfer credits your clients automatically when they send money to your MariBank account. MariBank emails you an alert for every incoming transfer; you forward those alerts from Gmail to your panel, and the panel matches each alert to the client's payment and adds the funds. Setup takes about 10 minutes and is done once.
Step 1 — Copy your forwarding address
In your panel admin, go to Settings > Payment Methods and open MariBank Transfer. Fill in your Account Name and the last 4 digits of your MariBank account, then copy the Forwarding address. It looks like pay+…@flashypanels.com and is unique to your panel. Keep the method off until setup is finished.
Step 2 — Open Gmail settings
Use Gmail on a computer (the mobile app cannot add forwarding addresses). Sign in to the Gmail account that receives your MariBank alerts and click the gear icon at the top right.
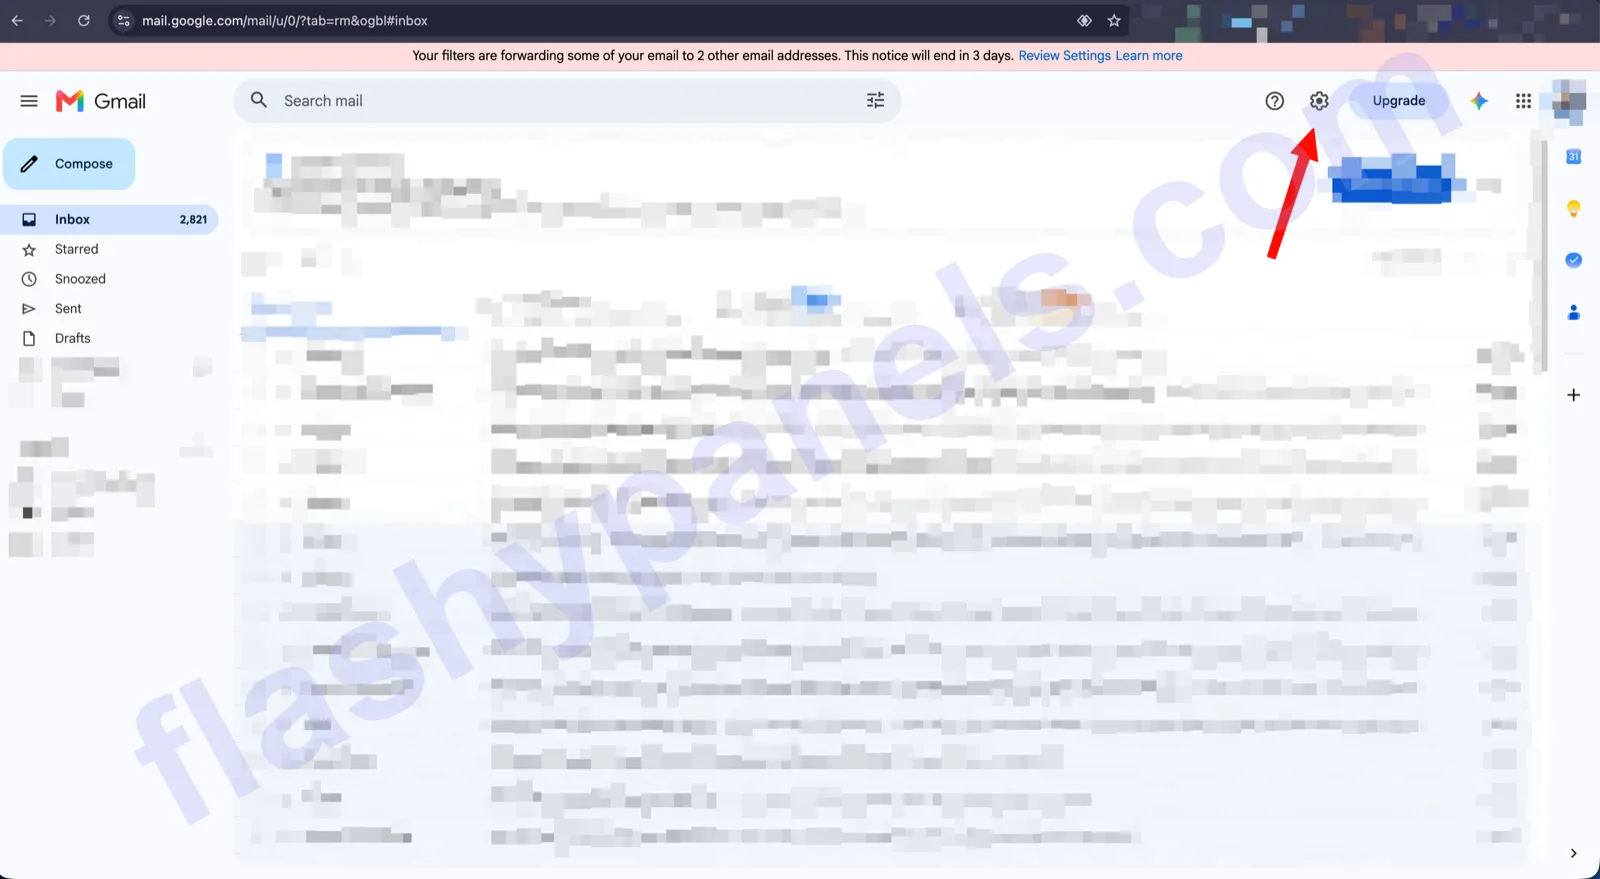
Step 3 — See all settings
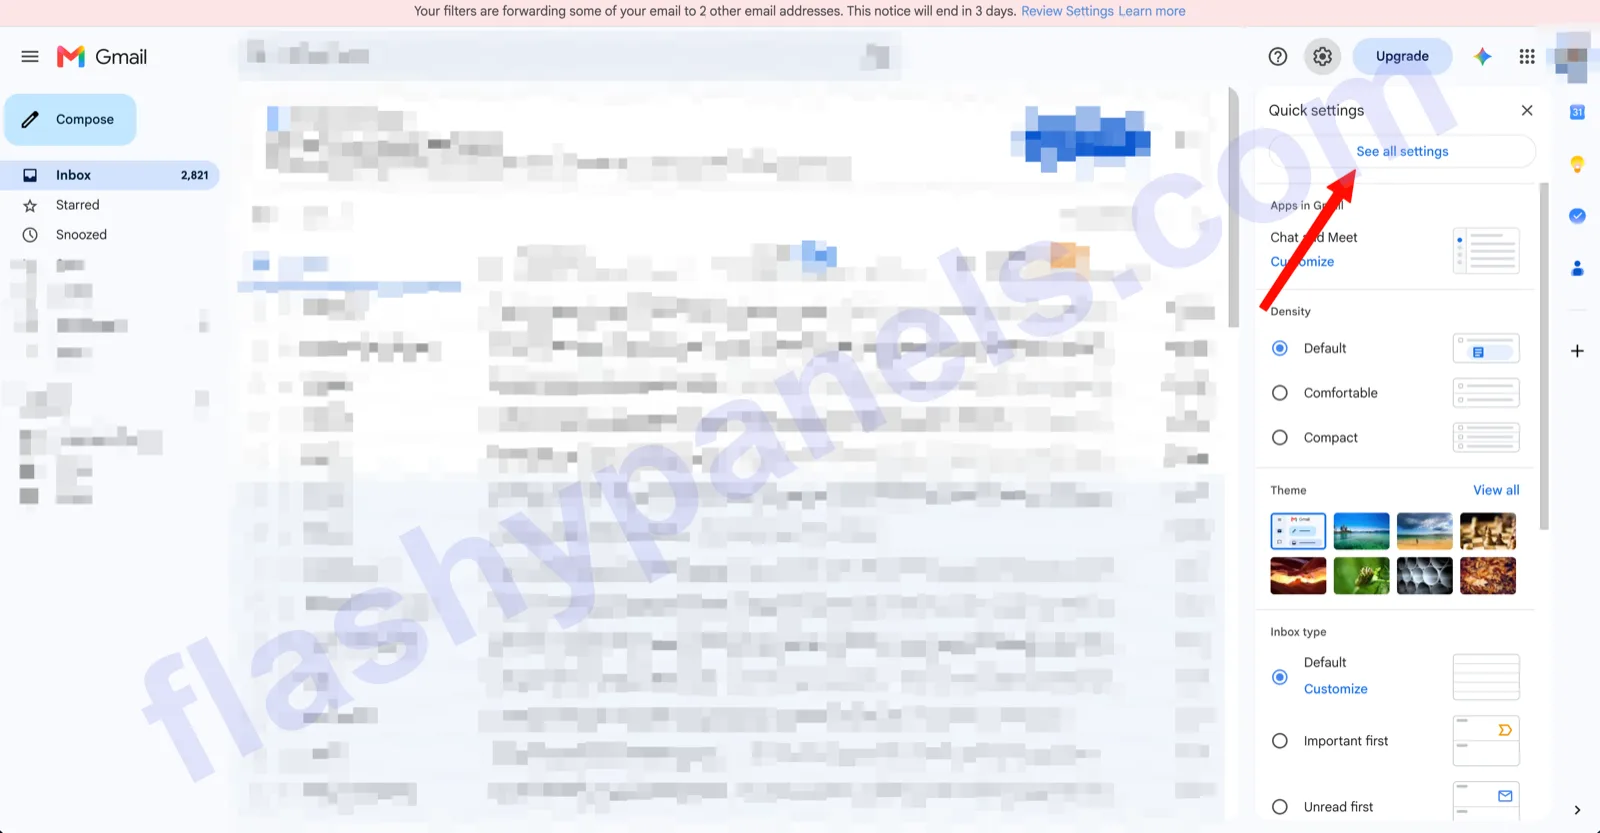
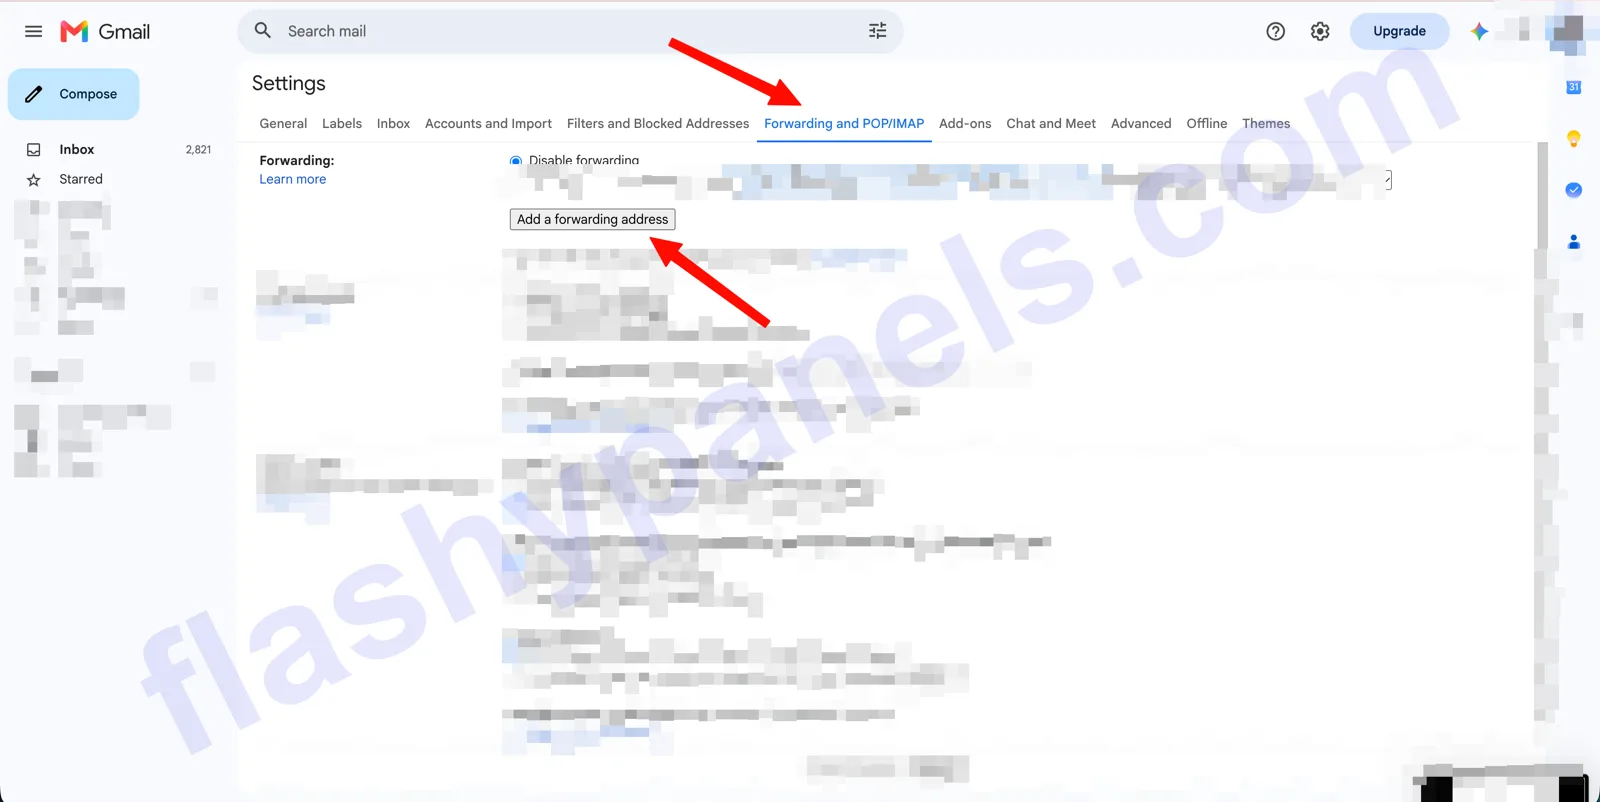
Step 4 — Add a forwarding address
Open the Forwarding and POP/IMAP tab and click Add a forwarding address.
Paste the forwarding address from Step 1, click Next, then Proceed and OK. Leave Disable forwarding selected — the filter in Step 6 forwards only MariBank alerts, not all your mail.
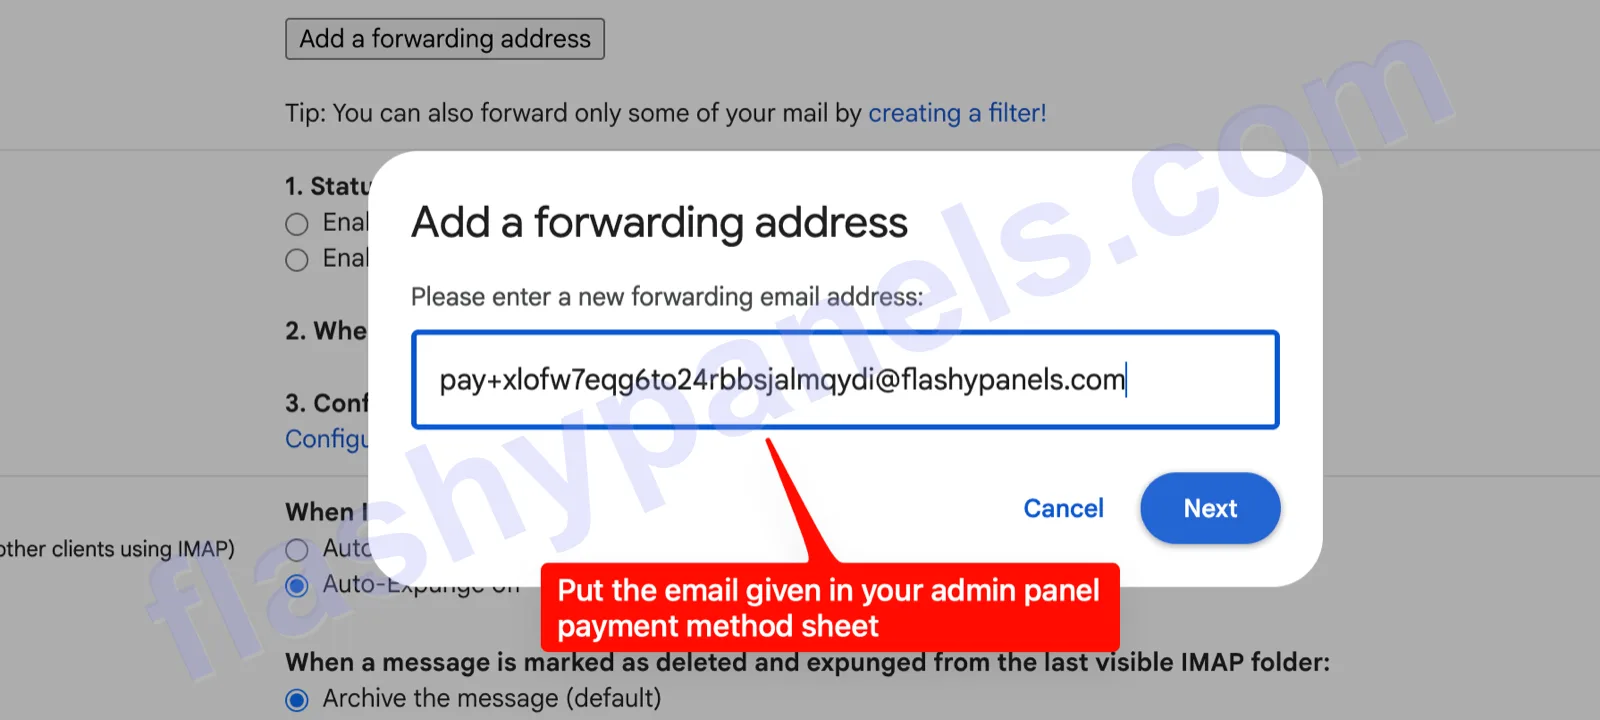
Step 5 — Wait for automatic confirmation
Google sends a confirmation email to the forwarding address. Your panel approves it automatically within about 5 minutes — you do not need to click anything. Back in admin, click Refresh on the MariBank Transfer method: a green Forwarding confirmed badge means this step is done.
If Google also sends you a confirmation email, do not click its links. One of them cancels the forwarding.
Step 6 — Create the filter
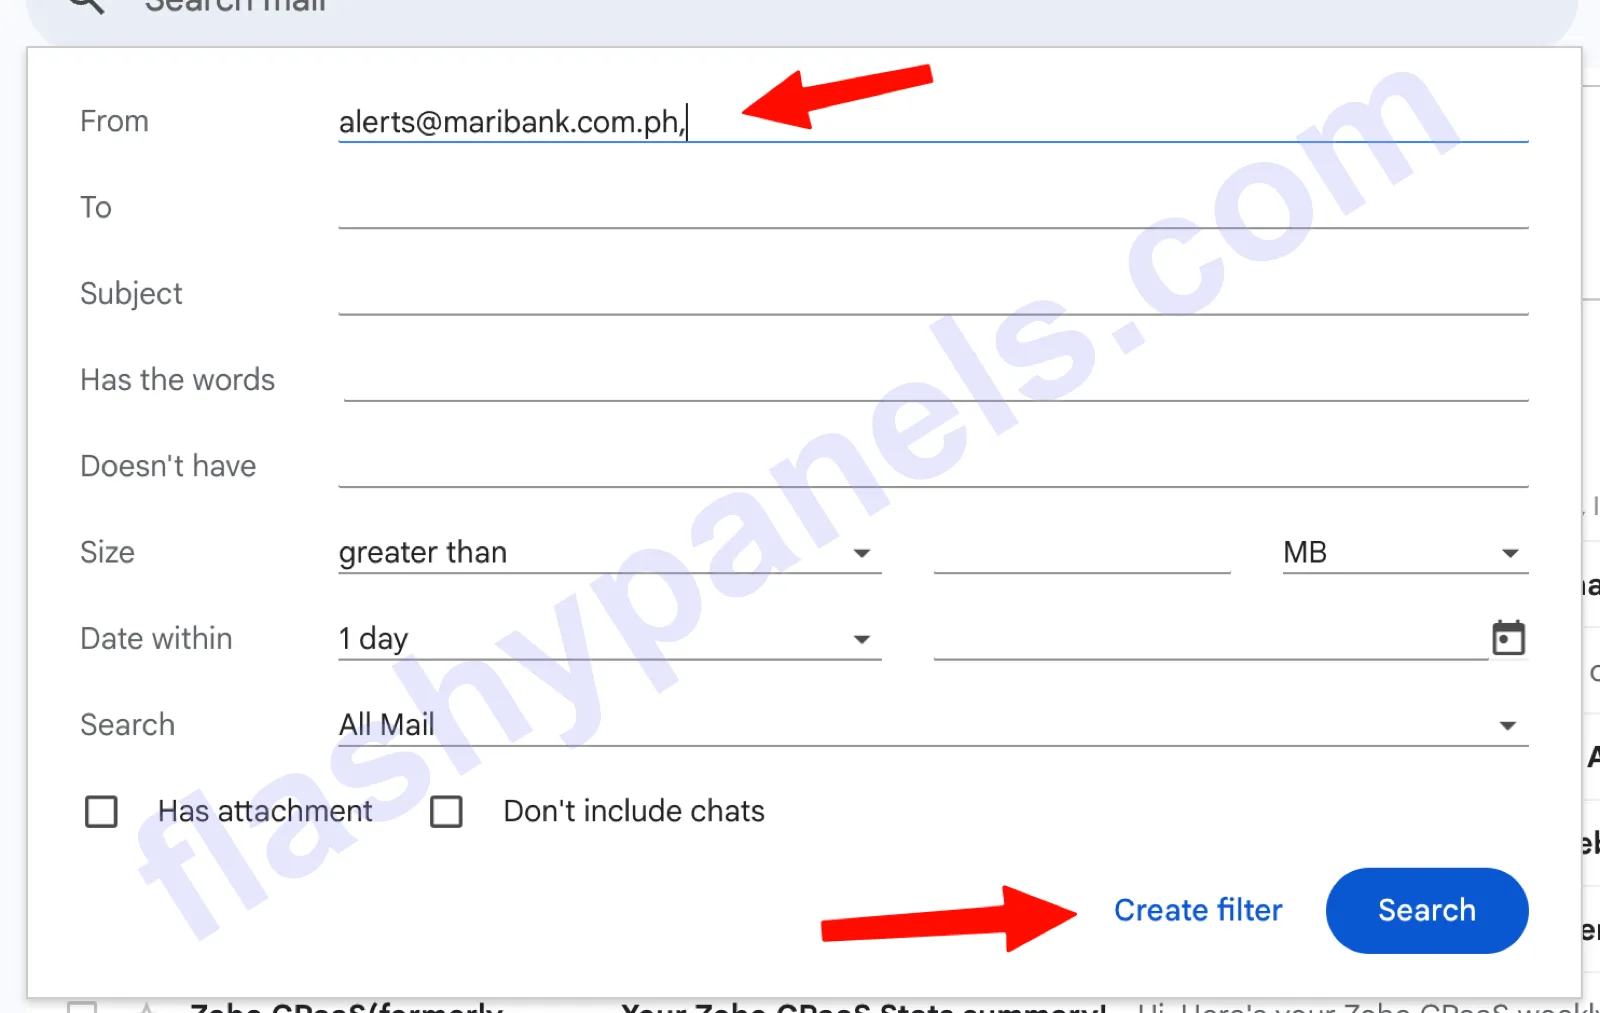
In the Gmail search bar, click the search options icon (the sliders on the right).

In From, enter alerts@maribank.com.ph and click Create filter.
Tick Forward it to and choose the correct address — the same pay+…@flashypanels.com address from Step 1. If it is not in the list yet, wait 5–10 minutes, reload Gmail and try again. Then click Create filter.
Step 7 — Add your payment QR (optional)
Clients can scan a QR code to pay instead of typing your account details. To get your QR:
- Open the MariBank app and tap Scan & Pay (the icon at the bottom center).
- Tap Receive by QR. Your own QR code appears.
- Download the QR image to your phone or computer.
- In admin, open MariBank Transfer, click Upload QR, choose the image and click Save.
Clients still have to enter the exact amount shown on the payment page, including the centavos.
Step 8 — Turn it on and test
In admin, switch MariBank Transfer on. Make a small test payment from a client account: start Add Funds, and send the exact amount shown to your MariBank account. The funds are credited automatically within a few minutes of the MariBank alert arriving.
Troubleshooting
- Badge stays red: check the forwarding address was pasted exactly, wait 5 more minutes and click Refresh.
- Payment not credited: the client must send the exact amount shown, to the account whose last 4 digits you entered, before the payment window expires.
- Clicked Regenerate address: the old address stops working. Add the new address in Gmail (Step 4) and update the filter (Step 6).
The same alert-forwarding setup works for CIMB and PDAX. For the full list of gateways, see payment methods, or the SMM panel Philippines page for local payment options.